
Restaurant-Quality Chicken Katsu at Home
Craving that satisfying crunch and juicy tenderness of restaurant-made chicken katsu? Believe it or not, this beloved Japanese dish is surprisingly easy to recreate in your own kitchen. Even better, this recipe yields restaurant-worthy results in under 30 minutes, making it a perfect weeknight dinner option.
But before we dive into the delicious world of homemade chicken katsu, let’s take a quick trip to Flavortown to understand what exactly this dish is all about.
What is Katsu? A Japanese Culinary Gem
Katsu, meaning “cutlet” in Japanese, refers to a culinary technique where meat or seafood is coated in breadcrumbs and deep-fried until golden brown and crispy. The two most popular variations are chicken katsu, the star of our recipe today, and tonkatsu, featuring a pork cutlet instead.
The delightful textural contrast between the shatteringly crisp panko crust and the juicy, tender meat within is what makes katsu so irresistible. It’s a symphony of flavors and textures that’s sure to tantalize your taste buds.

Chicken Katsu vs. Tonkatsu: A Tale of Two Katsu
While both chicken katsu and tonkatsu share the same basic preparation method, there are some subtle differences to note. Chicken katsu typically uses boneless, skinless chicken breasts, pounded thin for even cooking. Tonkatsu, on the other hand, features pork loin cutlets, which are often left slightly thicker than their chicken counterparts.
The flavor profiles can also differ slightly. Chicken katsu tends to be seasoned more simply with salt and pepper, allowing the natural flavor of the chicken to shine through. Tonkatsu, however, may be brined or marinated beforehand to add extra depth of flavor to the pork.
Ultimately, the choice between chicken katsu and tonkatsu comes down to personal preference. Both offer a delicious and satisfying eating experience.
A Step-by-Step Recipe to Crispy Chicken Katsu
Now that we’ve whet your appetite with some background information, let’s get down to the nitty-gritty of making chicken katsu at home. This recipe is designed to be straightforward and easy to follow, ensuring success even for beginner cooks.
Gather Your Ingredients:
For this recipe, you’ll need a handful of pantry staples and a quick trip to the meat counter. Here’s your shopping list:
- Chicken: 4 skinless, boneless chicken breast halves
- Seasonings: Salt and freshly ground black pepper
- Breading Station:
- 2 tablespoons all-purpose flour
- 1 large egg, beaten
- 1 cup panko breadcrumbs
- Oil for Frying: 1 cup of neutral oil with a high smoke point, such as canola or vegetable oil

Step 1: Prepping the Chicken
The first step is to prepare the chicken breasts. Using a meat mallet or rolling pin, pound each breast to an even thickness of about 1/2 inch. This ensures even cooking and creates a more tender texture. Season both sides of the pounded chicken generously with salt and pepper.
Step 2: Setting Up the Breading Assembly Line
To achieve that signature crispy coating, we’ll create a three-station breading assembly line. In three separate shallow dishes, place the flour, beaten egg, and panko breadcrumbs. Season the flour with a pinch of salt and pepper for an extra flavor boost.
Step 3: The Art of Breading
Now comes the fun part – coating the chicken! Take one chicken breast at a time and dredge it in the flour, shaking off any excess. Next, dip the floured chicken into the beaten egg, letting any excess drip off. Finally, transfer the chicken to the panko breadcrumbs and gently press to coat evenly on all sides. Don’t be shy with the panko – a thicker coating translates to extra crunch!
Step 4: Kiss the Pan, Hello Golden Brown!
Heat the oil in a large skillet over medium-high heat. Once the oil is hot (around 350°F), carefully place the breaded chicken breasts into the pan. It’s important not to overcrowd the pan, so you may need to cook the chicken in batches.
Fry the chicken for 3-4 minutes per side, or until golden brown and cooked through. To check for doneness, insert a meat thermometer into the thickest part of the chicken – the internal temperature should reach 165°F.
Step 5: Drain and Devour!
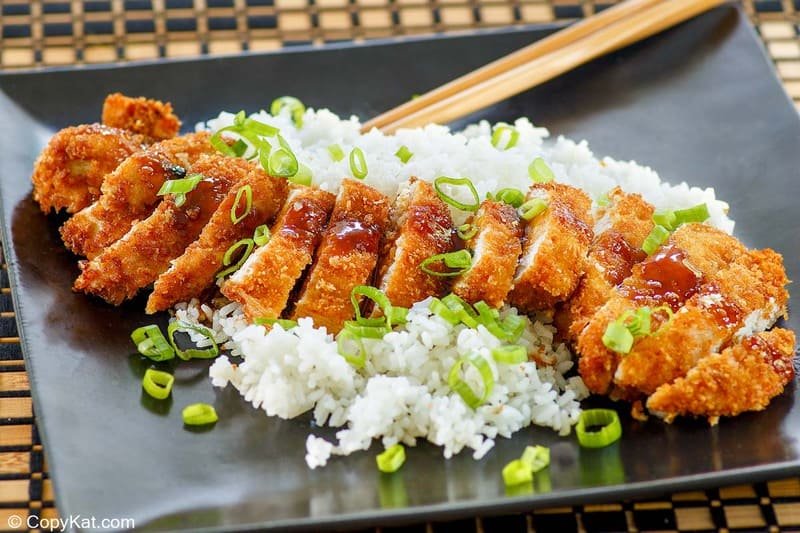
Once cooked through, transfer the chicken katsu to a paper towel-lined plate to drain any excess oil. Let the chicken rest for a couple of minutes before slicing it into thin strips. This is traditionally done to make the chicken easier to eat with chopsticks and allows the crispy coating to set further.

Serving Suggestions: A Katsu Feast Awaits!
Now comes the best part – plating up your delicious homemade chicken katsu! The possibilities are endless, but here are some classic accompaniments to elevate your katsu experience:
- Steamed White Rice: A bed of fluffy white rice is the perfect foundation for soaking up the flavorful juices from the chicken.
- Tonkatsu Sauce: This tangy and savory sauce is specifically made for katsu dishes. It’s readily available at most Asian grocery stores, but you can also find recipes online to make your own.
- Japanese Pickled Vegetables (漬物, Tsukemono): A refreshing and palate-cleansing side dish, pickled vegetables like ginger or daikon radish add a delightful contrast to the richness of the katsu.
- Miso Soup: This warm and comforting soup is a staple in Japanese cuisine and pairs beautifully with chicken katsu.
- Shredded Cabbage Salad: A simple salad with shredded cabbage, a light vinaigrette, and a sprinkle of sesame seeds adds a welcome crunch and freshness to the meal.
Tips and Tricks for Katsu Mastery
Here are some additional pointers to ensure your chicken katsu turns out restaurant-worthy every time:
- Oil Temperature is Key: Make sure the oil is hot enough before adding the chicken. If the oil is not hot enough, the panko coating will become soggy instead of crispy. Conversely, oil that is too hot will burn the coating before the chicken cooks through.
- Don’t Crowd the Pan: Overcrowding the pan will lower the oil temperature and lead to uneven cooking. Cook the chicken in batches if necessary.
- Panko Power: Panko breadcrumbs are essential for achieving that signature katsu crunch. They are lighter and flakier than regular breadcrumbs, resulting in a lighter and airier coating.
- Leftovers? No Problem! Leftover chicken katsu can be stored in an airtight container in the refrigerator for up to 3 days. Reheat them in a preheated oven at 400°F for 10-15 minutes, or until warmed through. You can also reheat them in the air fryer for a crispier result.
- Tonkatsu Twist: Craving pork instead? Simply swap the chicken breasts for pork loin cutlets of similar thickness and follow the same recipe. You may want to brine or marinate the pork beforehand for extra flavor.

Beyond the Basics: Chicken Katsu Variations
Once you’ve mastered the basic chicken katsu recipe, feel free to experiment with different variations:
- Chicken Katsu Curry: Drizzle your katsu with Japanese curry sauce for a hearty and flavorful meal.
- Chicken Katsu Donburi: Serve sliced chicken katsu over a bowl of rice with a runny fried egg for a delicious and satisfying donburi (rice bowl) dish.
- Chicken Katsu Sandwich: Katsu makes a fantastic sandwich filling. Tuck a sliced chicken katsu into a toasted bun with your favorite toppings like tonkatsu sauce, mayonnaise, and shredded cabbage for a delightful lunch or dinner option.
Chicken Katsu: A Culinary Adventure Awaits
With its delightful combination of crispy, crunchy, juicy, and flavorful, chicken katsu is a dish that’s sure to become a favorite in your household. This recipe empowers you to recreate this restaurant-quality meal at home, allowing you to customize it to your preferences and explore endless serving variations. So, grab your ingredients, fire up the stove, and embark on a delicious chicken katsu adventure!
Nutrition Facts (per serving)
| 297 | Calories |
| 11g | Fat |
| 22g | Carbs |
| 31g | Protein |
| Nutrition Facts | |
|---|---|
| Servings Per Recipe 4 | |
| Calories 297 | |
| % Daily Value * | |
| Total Fat 11g | 15% |
| Saturated Fat 2g | 12% |
| Cholesterol 118mg | 39% |
| Sodium 251mg | 11% |
| Total Carbohydrate 22g | 8% |
| Dietary Fiber 0g | 0% |
| Total Sugars 0g | |
| Protein 31g | 62% |
| Calcium 20mg | 2% |
| Iron 1mg | 7% |
| Potassium 239mg | 5% |
* Percent Daily Values are based on a 2,000 calorie diet. Your daily values may be higher or lower depending on your calorie needs.
** Nutrient information is not available for all ingredients. Amount is based on available nutrient data.
(-) Information is not currently available for this nutrient. If you are following a medically restrictive diet, please consult your doctor or registered dietitian before preparing this recipe for personal consumption.
Powered by the ESHA Research Database © 2018, ESHA Research, Inc. All Rights Reserved